Over winter break, our family received Goodnight iPad, a humorous children’s book that pokes fun of our tech-obsessed culture while giving a nod to the humble book. I enjoyed the read, and my 2-year-old has it in heavy rotation right now.
I’ve been experimenting with various camera apps for the iPhone and iPad in the last couple of months, as I build lesson plans for real-world math applications using photography.
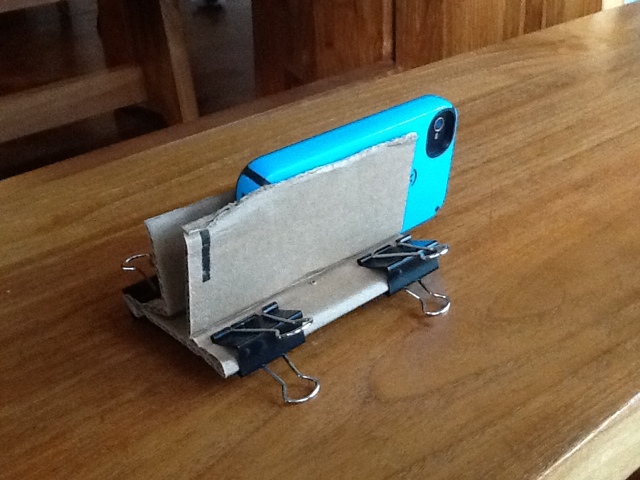
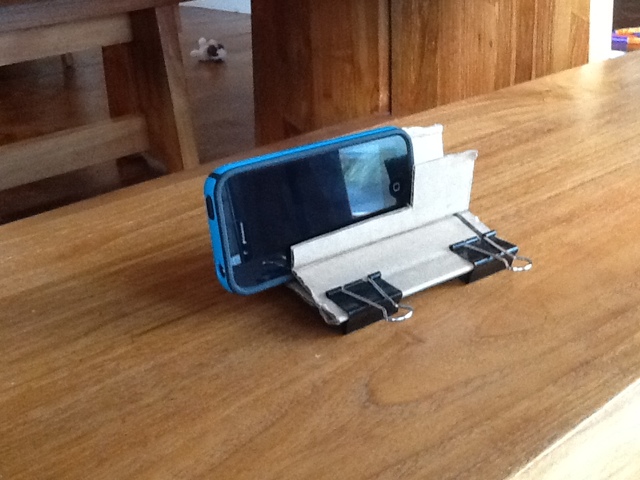
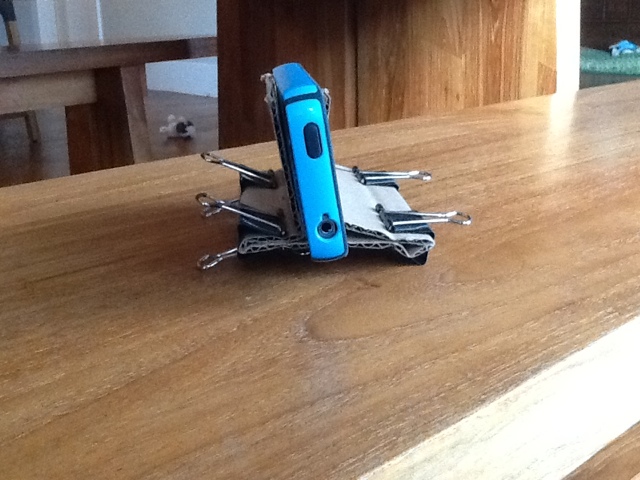
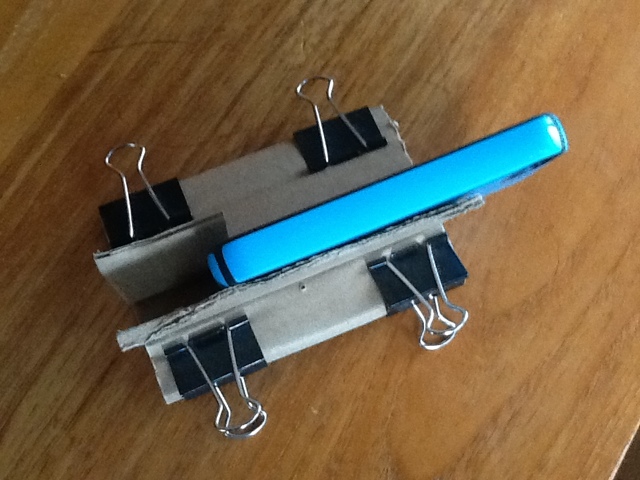
Many of the apps use bursting shots and time-lapse, as that is where a lot of cool mathematical concepts lie. These require a steady hand, a tripod, or a stand. Since my budget doesn’t include money for student stands, I decide to spend 5 minutes making a simple free cardboard iPhone holder.
So far it is sturdy, stable, and easy to use. And free.
*Update 12/10/11 – I’ve given up on using YouTube’s RSS feed due to the time lag. Now I just create a homework post that includes the video AND the response form. My blog RSS updates immediately and then MailChimp scrapes it to send home.
In my experimentation with a time-shifting flipped classroom model, I’ve been building videos for both students and teachers but have been searching for a way to automatically collect data on how much of my intended audience is using the material.
I’m happy with using a Google Form to check for comprehension post-video: Ramsey Musallam taught me to use a post-video survey to collect student responses with material, a quick question and answer check-in that asks students to regurgitate but then synthesize the information they’ve just reviewed.
I’m wasn’t yet happy with figuring out how often my students are accessing content. I can look for number of video views and average time spent on video, but that doesn’t tell me who or when. This desire is complicated by the fact that my students are 10-12 years old, and I don’t want to sign them up for any third-party accounts to receive notifications. My current system relies on YouTube’s hidden RSS feeds, Google Apps for Edu’s email system, and GApps free MailChimp service.
Step 1: YouTube’s hidden RSS feed
With the current YouTube system, to subscribe to a channel or create a personal channel, YouTube asks my students to create their own YouTube account and then link it with their school Google Apps account. I can’t and won’t ask a 10-year-old to create an account, so I need a different solution.
Fortunately, YouTube actually generates a hidden user RSS feed. This isn’t publicized and it isn’t perfect – in my testing it takes up to 6 hours for a new video to be added to the RSS feed.
Once I have the RSS feed, I had to figure out how to get new post updates into my existing student system. I could have used Google Reader, but that would require that students visit the Reader site to check for updates. I want an automated system that would push new content directly to my audience.
If students use Apple Mail or Microsoft Outlook, they can subscribe to the feed and receive updates directly in their email program. My students only use the Gmail interface or IMAP to Mail for iPad, neither of which have an RSS subscription feature.
I took a tip from email marketers and decided to look for a way to send a note to student inboxes when a new video is posted. Within my Google Apps for Edu deployment, I enabled the brilliant and free MailChimp Marketplace Solution.
Step 3: MailChimp & RSS integration
With MailChimp enabled, I authenticate into the service and build a new campaign to send out an email update to my subscriber list when a new video is posted. This allows me to automatically email my students every time there is a new video and track who clicks on the link and how often they do so.
Conclusion
The real test of comprehension is the conversation and project-based learning that occurs in the classroom after students have engaged online content. However, with accurate data on which of my students have clicked through to the new video, in-video self-quizzes with chapter markers for key concepts, and a post-viewing survey, I can get a better understanding of how my students use the material prior to classroom arrival.
It also allows me to make connections and support students on an individual level. I can keep an eye out for inconsistencies – a student that doesn’t complete the online survey but can speak with understanding in the classroom; a student who doesn’t share at school but expresses themselves at-length online; a student who only accesses content during study hall; a student who can regurgitate information word-by-word but can’t put their learning into open-ended practice, etc.
My current MailChimp integration system isn’t perfect due to the time lag between posting a video and the RSS feed update. To ensure that the assignment email blast goes out on the right day, I typically post the video first thing in the morning, giving YouTube enough time to update the RSS feed. Some students visit the site of their own initiative, and so their clicks aren’t recorded.
However, this solution keeps my student information safe and doesn’t require additional accounts, services, or software for my students or myself. This solution is fully automated once I post a video online, and the combination of click-through rates, average time spent-on-video, and Google Form results create a fairly comprehensive collection of individual and group habits.
If readers have an alternate way of scraping YouTube for new content, I’d love to hear about it in the comments and incorporate into my existing practice.
I just uploaded a test video to Vimeo to compare the time between posting and RSS feed update. If the time lag is significantly less, then this may be a better video sharing option for automation.
For teachers or students looking to learn more about web development, an online sandbox is a great place to play. Accessing a server’s file structure is simple using FTP, and makes a beginner feel like an all-powerful hacker. A few clicks of a button can change a website for the entire world!
If you’d like to provide FTP access for educators and classes to experiment with, consider a remote location that won’t affect the functioning of the public presence. One option might be Dreamhost.com’s free non-profit hosting plan. Super nice people, quick support response time, carbon neutral, and one-click install plans for WordPress, Drupal and other content management systems.
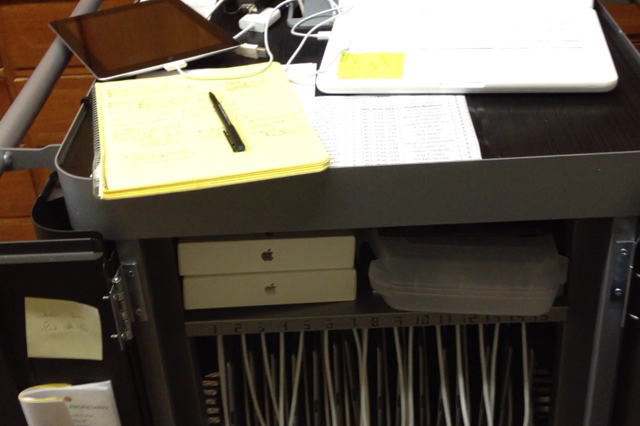
Innovative teachers, IT directors and Technology Integration Specialists are gearing up for the murky process of upgrading iPad deployments to iOS 5 in the coming weeks. Apple happily sells iPads to educational environments and offers paid engineering support, but there aren’t a specific set of tools designed specifically to support the granular control that IT departments, state & federal law, and school districts require.
I decided to jump in yesterday and make every mistake possible in an effort to come up with best practices. I’ve documented 5 tips that should save anyone upgrading multiple iPads at least 5 hours on the big day. Time savings are based on a single 30-iPad cart…more devices means more time saved:
Download and update all software a day or two PRIOR to beginning your upgrade process.Day-of time savings: 3-8 hours depending on connectivity. Nothing is worse than jumping in ready to go and realizing you have hours of download time before starting!
OSX 10.7 updates range from 50MB to a few hundred MB. Some (like the firmware updates) require a restart.
iTunes updates are similar to OSX in terms of size.
iOS 5.0.1 is 750MB. You will want a local copy stored in case of any upgrade errors. To download, plug in an iPad, open iTunes and select “Update.” Choose “Download only” when prompted…do not choose “Download and install.”
XCode is 4GB, unless you are upgrading to 4.2 (which is still 1.5GB). This software is free from the Mac Store and allows you to update multiple iPads at one time, instead of iTunes’ one-at-a-time process.
Update all of the iPad apps that will be on each device. Some, like GarageBand are over 1GB. Updating iTunes and then pushing out the latest version saves you tons of time and bandwidth, as updating on each iPad takes n times longer (n = number of devices you are touching).
Disable auto-sync in iTunes.Time savings: 15-150 minutes. When an iPad (or a sync cart full of iPads) is connected to the control computer, iTunes will open, backup and then perform a sync on each device. The sync takes longer if you’ve made additions or upgrades to the apps/music/books. Best case scenario, the sync takes 30 seconds per device. Worst case, up to 5 minutes or so per device. To disable auto-sync:
Open iTunes without any devices connected to the computer.
Click on “iTunes” in the top nav and select “Preferences.”
In the resulting window, select the “Devices” tab.
Below the list of devices, select “Prevent iPods, iPhones, and iPads from syncing automatically.”
Disable iPhoto’s import preparation assistance.Time savings: 15-150 minutes. If an iPad has photos on it, iPhoto will sometimes try to open and prep for an import. iPhoto will open, mount the device and then pull thumbnails in preparation to copy the files. This process can take 30 seconds for a few photos or minutes if there are a number of photos and video.
Open iPhoto without any devices connected to the computer.
Click on “iPhoto” in the top nav and select “Preferences.”
Find the dropdown menu next to “Connecting camera opens” and select “No application.”
Have students deliver devices to the sync location, remove iPads from cases and label the cases clearly.Time savings: 15-30 minutes. Many hands make light work, and removing and documenting each 1-to-1 device can easily take 30 seconds to a minute for a single person. This tip is most valuable for larger scale deployments where students have their own cases, but is still useful for many-to-1 configurations.
For anyone updating more than 5 iPads, use XCode for multiple concurrent iOS upgrades.Time savings: 1.25-4 hours. iTunes lets you update a single iPad and will then restore the device and wait for you to press a few buttons to start the next device. XCode (free software from the Mac Store) allows you to access and write to as many iPads as you like. Once a device is complete, it will appear in iTunes ready to be restored from a backup. iTunes will automatically use a unique identifier (UDID? Serial #?) to find the right backup for the particular iPad. This means you can begin the manual restoration process while other iPads are still upgrading their operating system. The entire process isn’t completely automated yet and still involves some clicking, but XCode definitely saves time. Thanks to Joseph Morelock and his team ((MacGyver Chronicles, Episode 2: Restoring Multiple iOS Devices Using Xcode Organizer)) for the thorough documentation.
Two final thoughts for making the day run smoothly:
Through all of this clicking at waiting, be sure to have other tasks at hand that require intermittent attention. Is your closet in need of a cleaning and reorganization? Have paperwork to file? Is it time to clean out your email inbox?
Having someone else to chat with and talk through the process makes the time go by much more quickly. If you have 2 sync carts, then the two of you can even compete in IT jedi upgrade races. Thanks to @anotherschwab of SmallSchoolBigTech.com who served as my Twitter therapist as I worked through the process solo.
YouTube doesn’t have to be a place where viewers passively watch video. Free annotation tools allow content creators to provide interactive opportunities to engage content. The resulting video can be used as part of a flipped classroom model or to time-shift any kind of instruction.
This video tutorial shows you exactly how to create buttons that can be placed on your video to jump forwards and backwards within the timeline.
Demonstration #1: Interactive Flipped Instruction
Here is an example of an interactive lesson on fractions that use YouTube annotations to create a quick self-quiz. ((From a previous blog post: Interactive flipped instruction with YouTube annotations and time-markers)) This flipped instruction (flipped classroom) example redirects the viewer directly into the pertinent portion of the lecture that addresses any incorrect answers:
Demonstration #2: Chapter Markers in YouTube
Here is an example of a video that covers several different topics and includes an introductory table of contents that can be accessed at any time. ((From a previous blog post: Screencasting and flipped instruction: beyond math ))
Demonstration #3: Allow viewers to create their own content
Final example is fun but also a powerful example of the freedom that interactivity allows. Use the buttons to play the piano and create your own song – one that the original video creator could never have imagined.
Rushton Hurley of NextVista.org hosted a webinar today on “Digital Identity and Adolescence.” I presented with Ted Kalmus, Head of School at Billings Middle School.
Flipped instruction (the flipped classroom model, vodcasting, time-shifting) is an attractive concept because of the in-class time that is freed to work through concept application and discussion. One of the criticisms of this teaching tool is that students receive knowledge in a passive state – by watching video.
In an attempt to create a more interactive experience for students, YouTube annotations and time-markers can be used to create “check-ins” as the lesson progresses. Below is a simple proof of concept* using a review of fractions. There are an infinite amount of creative possibilities using these free tools, and they work when viewed at YouTube.com or when embedded into a class website.
How might you use these tools – feel free to comment below.
*This is just a proof of concept. Audio quality is low and audio/video channels get out of sync towards the end.